
If you walk into a store today looking for “the best Wi-Fi for a large home,” you will be pointed toward premium Mesh systems like the Netgear Orbi 970 or the Eero Max 7. They promise “blanket coverage” for a staggering price: $1,600 to $2,300.
As a Telecommunications Engineer, I want to show you a smarter way. You can build a network that covers your home just as well, costs a fraction of the price, and offers something those consumer systems don’t: Flexibility.
Here is how to use professional tools to map your home and build a sub-$480 “Hybrid” setup.
Transparency Note: This article contains affiliate links. As an Amazon Associate, I earn from qualifying purchases at no extra cost to you. This helps support the blog.
The Blueprint (Stop Guessing)
Whether you buy a Mesh system or a pro system, placement is everything. If you place a Mesh node in a “dead zone,” it has no signal to repeat. It’s useless.
The tool we are using is the UniFi Design Center. It is web-based, free, and incredibly powerful. You don’t need to own Ubiquiti equipment to use it; you just need a free account (or access as a guest).
Step 1: Upload Your Blueprint
You need a floor plan of your house. It doesn’t have to be an architectural blueprint.
- Pro Tip: If you don’t have plans, take a screenshot of your house on a real estate website (like Zillow or Redfin) or sketch it roughly on paper and take a photo.
- Upload the image to the Design Center and use the “Scale” tool to set a reference distance (e.g., “this doorway is 3 feet wide”).
“Don’t have a blueprint? Use your phone.” You don’t need architectural drawings. Download a free scanning app like Magicplan or CubiCasa. These apps use your phone’s camera to scan your rooms and generate a floor plan in minutes. Once scanned, export the plan as a JPG or PNG image. That is all the UniFi Design Center needs. Even a hand-drawn sketch on a napkin works, as long as you know the length of at least one wall to set the scale.
Step 2: Draw the Walls (The Physics Part)
This is where the engineering magic happens. You need to trace your walls, but you must tell the software what they are made of.
- Drywall: Blocks a little signal.
- Brick/Concrete: Blocks a lot of signal.
- Glass: Can block or reflect signal depending on the coating.
The software uses this data to calculate attenuation—the loss of signal strength as it passes through obstacles.
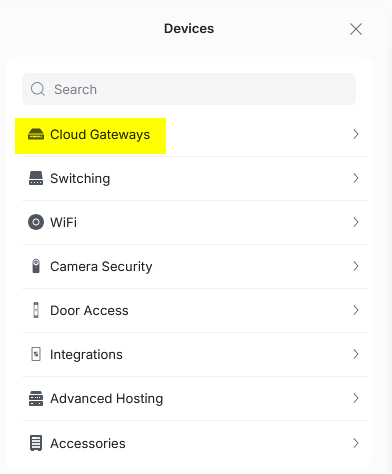
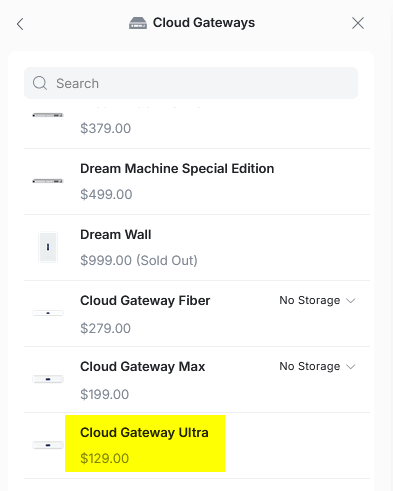
Step 3: Choose the Gateway:
Follow the yellow paths below:
Step 4: Choose the Workhorse and the fillers
Follow the yellow paths below:

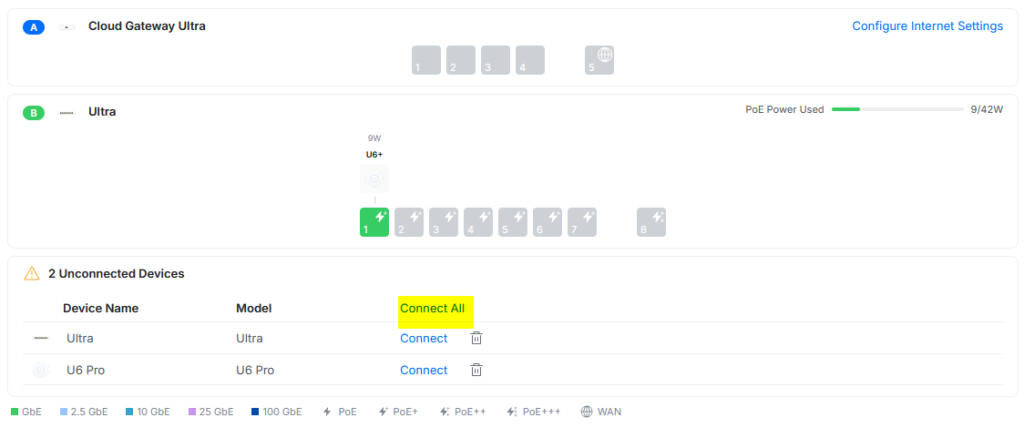
Step 5: Connect equipment
Follow the yellow path below:
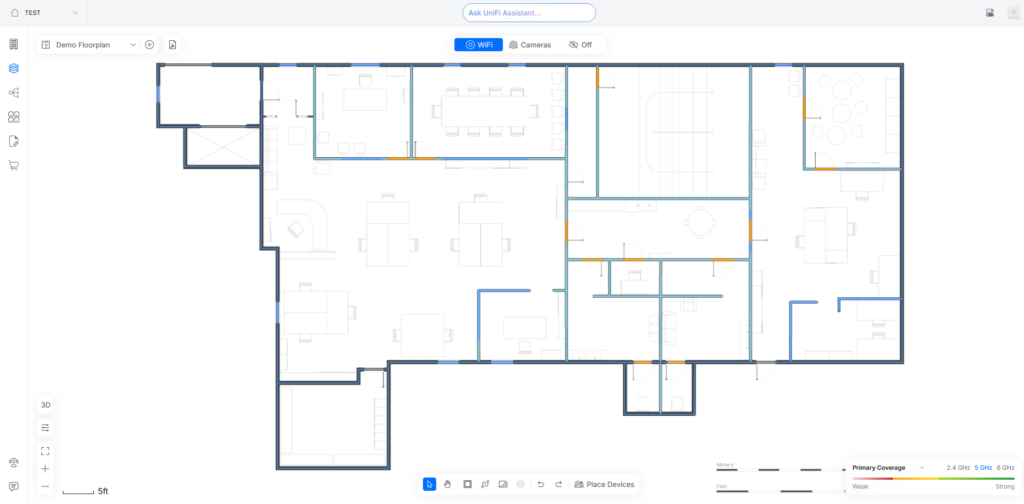
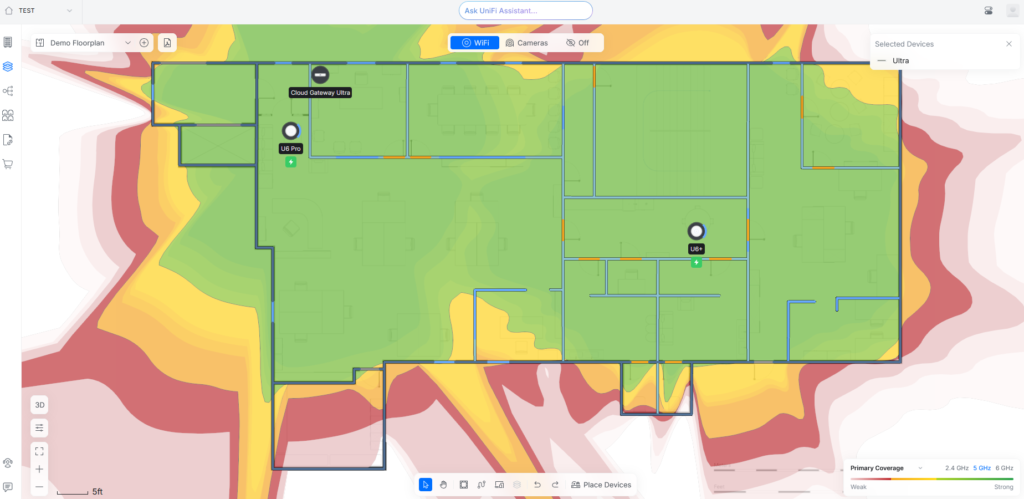
Step 6: The Simulation
Now, drag and drop a Wireless Access Point (AP) onto your map. Instantly, you will see a “Heatmap”:
- Red/Orange: Strong, fast signal.
- Green: Good browsing speed.
- Blue/Purple: Dead zones.
Move the AP around. You will be shocked at how moving a device just 5 feet down the hall can turn a “Blue” bedroom into a “Green” one.
Added the gateway and the “workhorse” U6 Pro:
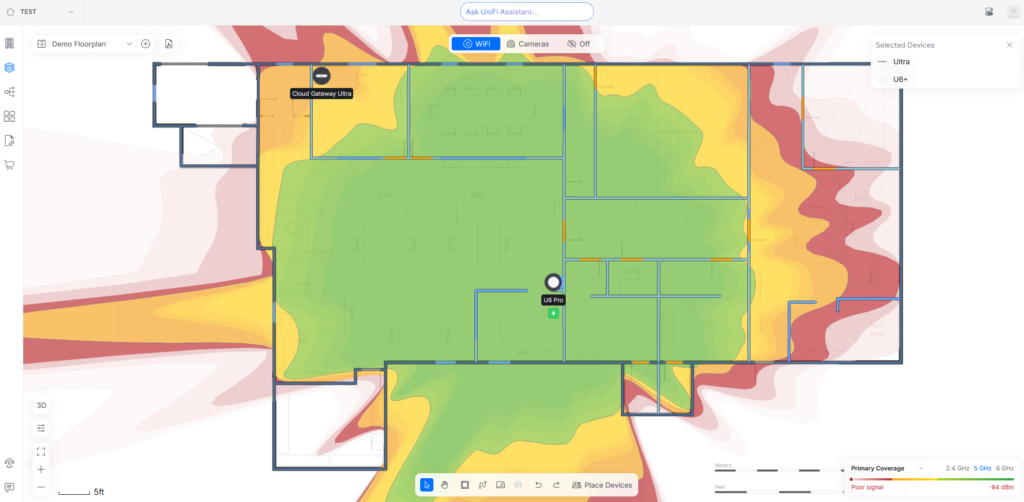
Added the additional U6+ as a Mesh filler:
The “Minimum Viable Project”: What Hardware to Buy?
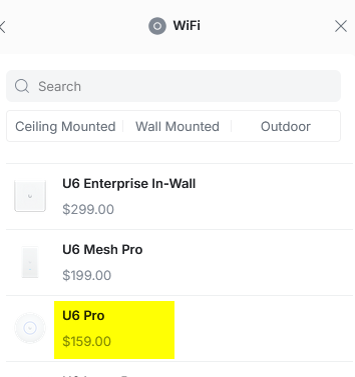
Once your map is full of green signal, look at the equipment list on the right side of the screen. You might see some very expensive options like the “U6 Enterprise” ($279).
Don’t buy that. Unless you are running a stadium or a hotel, that is overkill.
The Verdict: Why It Beats Consumer Mesh
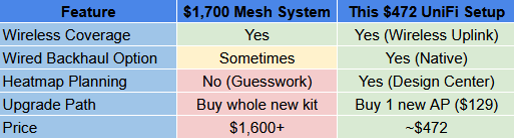
By using the Design Center to find the perfect spot, you ensure your wireless link is strong without overspending on hardware. That is the engineer’s way: Better design, lower cost.
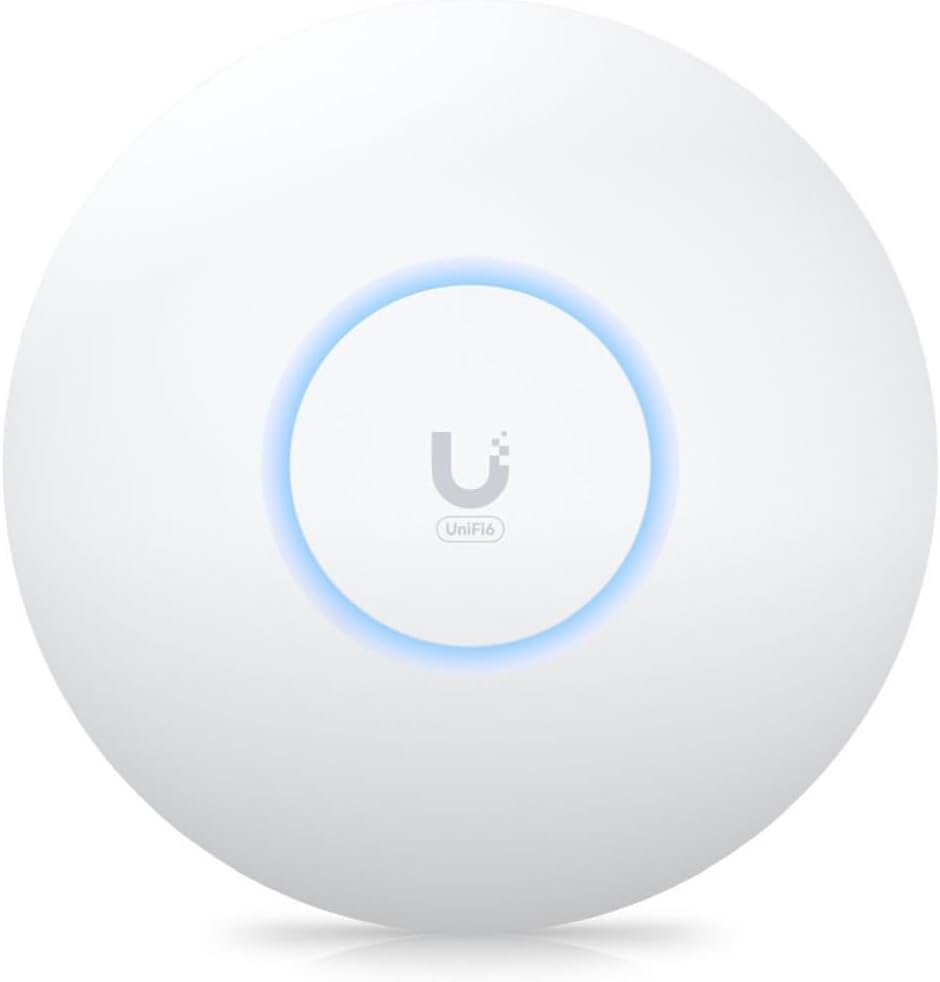
1. The Workhorse: U6 Pro

This is the sweet spot of the entire lineup.
Why: It has excellent antenna gain and handles dozens of devices effortlessly.
Where to put it: Place this in your high-traffic area (Living Room or Kitchen). In your simulation, you’ll see this single unit covers a huge area.
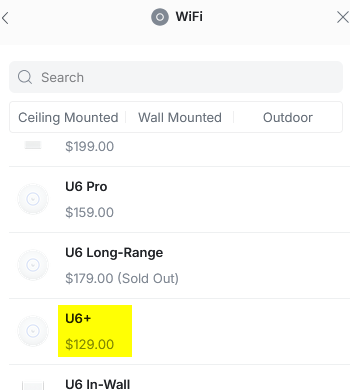
2. The Filler: U6+
If your heatmap shows a dead zone in the master bedroom or garage, don’t buy another Pro.
Why: It’s smaller, cheaper, and perfect for “filling in the gaps” where you just need coverage for phones and smart bulbs.
Where to put it: Hallways, offices, or far ends of the house.
3. The Brain: The Gateway
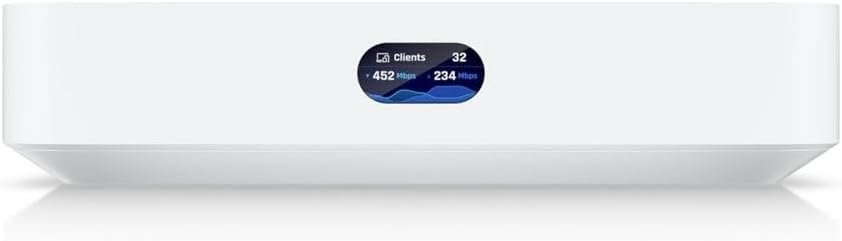
Remember: Unlike standard routers, these “Access Points” are just antennas. They need a brain to tell them what to do. You will need a UniFi Cloud Gateway or a Dream Machine to plug these into. This device acts as your main router and connects to your modem.
4. The “Hidden” Component (Power)
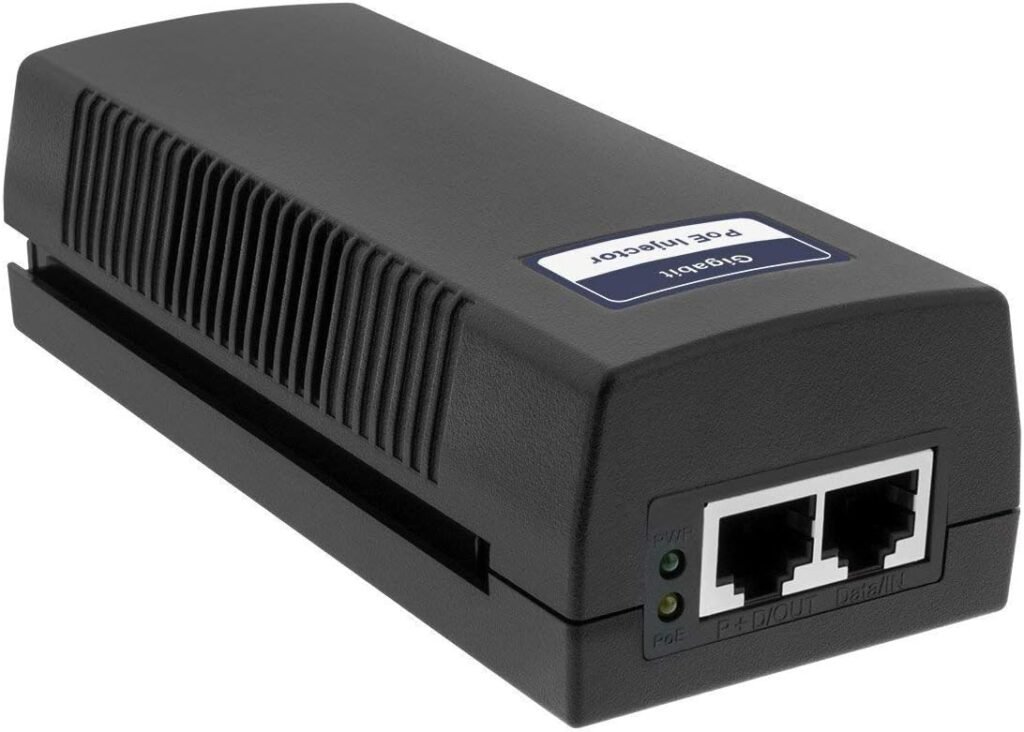
Here is the only catch. Professional Access Points don’t come with power cords; they use PoE (Power over Ethernet). Since you likely don’t have a specialized switch, you need Injectors.
- You need: 2x PoE+ Injectors (~$15 each).
How to connect it wirelessly (Mesh Mode): Wall Outlet -> PoE Injector -> Short Cable -> U6+ Access Point. (The data travels through the air, the cable just provides power).
Conclusion
Professional networking isn’t about guessing. It’s about data. Spend 20 minutes on the Design Center today. You might find out that you don’t need a $600 Mesh system—you just need one well-placed Access Point and the right plan.
Ready to build? Start mapping, and when you are ready to buy, stick to the U6 Pro and U6+ to get the best performance for your money.
Still confused about terminology? Read my deep dive on Mesh vs Extenders to understand the basics.
If you can’t run Ethernet cables for your UniFi APs, MoCA adapters are the best alternative to maintain 2.5Gbps speeds.