You found a great deal on Amazon. A 4K security camera with night vision, human detection, and a sturdy metal body for under $60. It looks like a steal.
But then you read the forums. You see words like “Backdoor,” “Phone Home,” and potential security risks linked to budget camera brands (often manufactured by giants like Hikvision or Dahua).
As a network engineer, I love this hardware. The image quality per dollar is unbeatable. But I never trust the software.
The good news? You don’t need to be a cybersecurity expert to use these cameras safely. You just need to put them in “Time Out.”
Here is the 101 guide to locking down your cameras so they can record intruders, but can’t talk to anyone else.
Transparency Note: This article contains affiliate links. As an Amazon Associate, I earn from qualifying purchases at no extra cost to you. This helps support the blog.
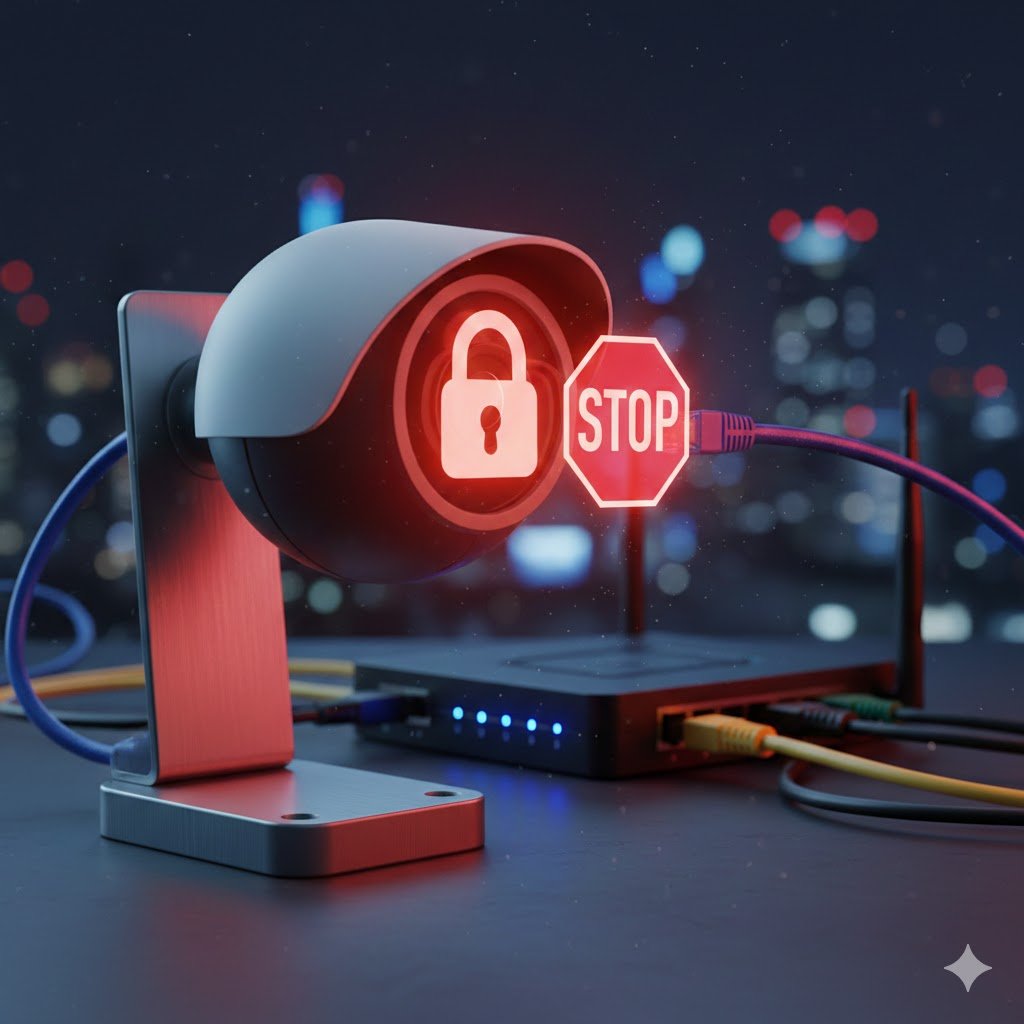
The Problem: “P2P” and “Phone Home”
Most budget cameras come with a feature called P2P (Peer-to-Peer) enabled by default. This is designed for convenience: it allows you to view your camera from your phone when you are not home, without configuring anything.
How it works: The camera constantly “pings” a cloud server (often overseas) saying: “I am here! My ID is XYZ. Connect me to the app.”
If that server is compromised, or if the camera has a hidden vulnerability (backdoor), your video feed is exposed. We want to stop this conversation.
Step 1: Turn Off “UID” and “P2P” (The Easy Fix)
Open your camera’s specific app (whether it’s Amcrest, Reolink, or a generic “Smart Life” app). Look for a setting usually hidden in the Network or Advanced menu called:
- UID
- P2P
- Platform Access
Turn this OFF. By disabling this, the camera stops trying to punch a hole through your firewall to reach the manufacturer’s server. Note: This might break the “remote view” on the manufacturer’s app. We will fix that later.
Step 2: The “Parental Control” Hack (The Kill Switch)
This is the engineer’s favorite trick for home users. You don’t need a fancy $500 firewall. You probably have a “Firewall” in your pocket right now: your Router App.
Most modern Mesh systems (Eero, Google Nest Wifi, TP-Link Deco) have Parental Controls.
- Open your Router App.
- Find your camera in the device list.
- Create a profile called “Cameras.”
- Add the camera to this profile.
- Pause the Internet for this profile. Permanently.
The Result: Your camera can still talk to your local NVR or HomeBase (inside your house) to record video, but if it tries to send a single byte of data to the internet, your router will kill the connection immediately. It is effectively “Air Gapped.”
Step 3: Use a “Guest Network” (Isolation 101)
If your camera connects via Wi-Fi, do not put it on your main network with your laptop and banking data. Almost every router has a “Guest Network” feature.
- Enable the Guest Network.
- Connect only your IoT devices and Cameras to it.
- Ensure the setting “Allow guests to see each other” or “Access Intranet” is OFF.
This creates a digital wall. Even if a hacker gets into your cheap camera, they are trapped in the “Guest Zone” and cannot jump over to your main computer.
But… How Do I Watch My Video Remotely?
You just blocked the camera from the internet. So how do you see the feed when you are at work? You have two safe options:
- The VPN Method (Best): Some routers (like ASUS or TP-Link) have a built-in “VPN Server.” You turn this on, and your phone connects securely back to your home network. It’s like you never left the house.
- The Safe Gateway (Easiest): Use a secure ecosystem like HomeKit Secure Video or a trusted NVR (Network Video Recorder) that acts as a middleman. You block the cameras, but you allow the NVR (which is from a trusted brand) to have internet access.
Ready to Level Up? The “Pro” Engineer Setup
The methods above (Parental Controls and Guest Networks) are great for beginners. But if you want to build a true “Zero Trust” network with dedicated VLANs (Virtual LANs) to physically isolate your traffic, you need the right hardware.
You don’t need to spend thousands on Enterprise gear. Here is the exact budget stack I recommend for a secure home network:
1. The Gateway: TP-Link ER610 (Omada)
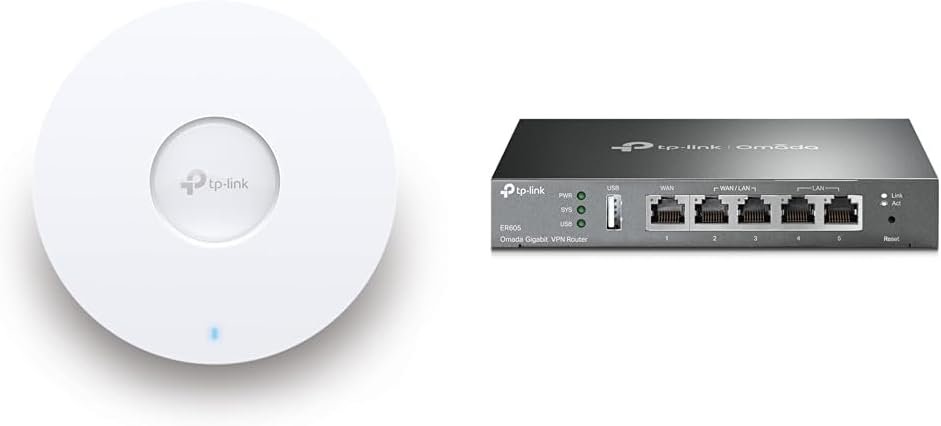
Most home routers (like Eero or Nest) hide the advanced features. The ER610 is a professional Gigabit VPN router that costs less than a video game.
Why I like it: It supports 802.1Q VLANs out of the box. You can create a specific “Camera Network” that has zero access to your main PC.
2. The Power: TP-Link TL-SG108PE (Managed PoE Switch)
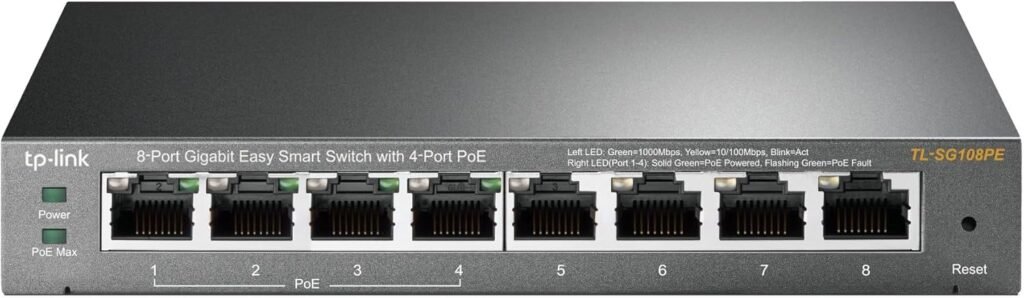
To run VLANs, you need a “Managed” switch. To run cameras, you need “PoE” (Power over Ethernet). This switch does both.
Why I like it: It powers 4 cameras directly via the ethernet cable (no messy power bricks) and lets you “tag” their traffic into the secure VLAN.
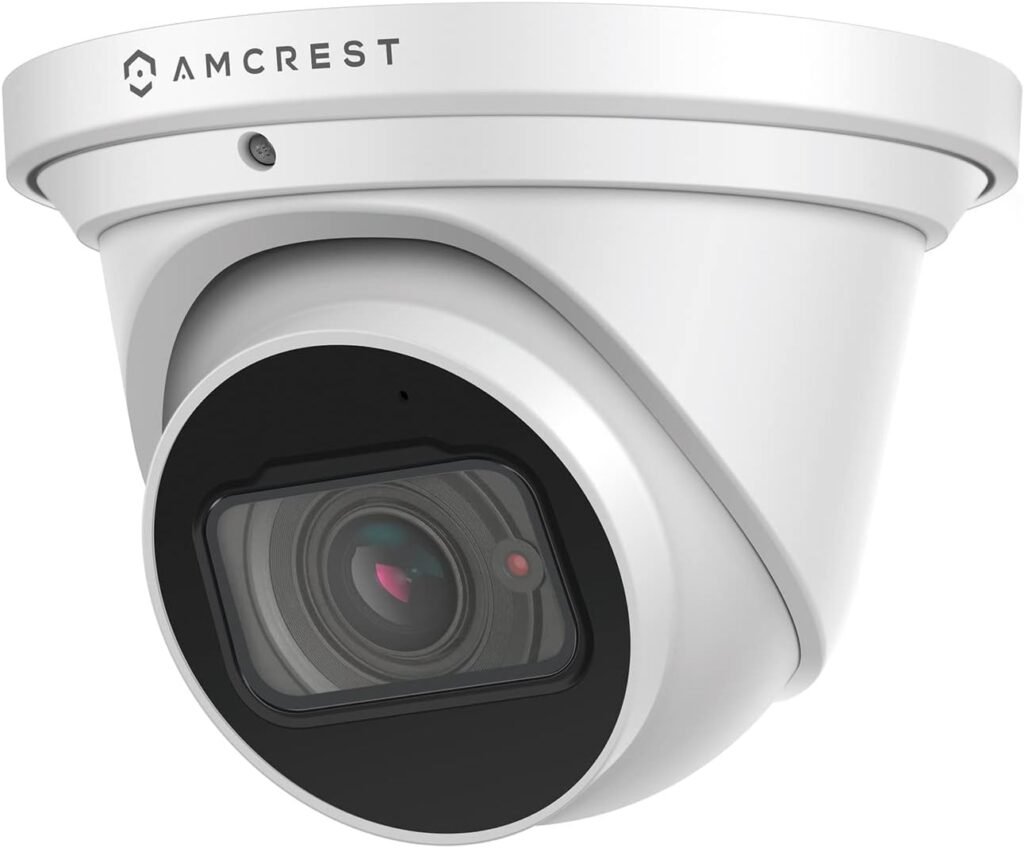
3. The Camera Hardware: Amcrest 4K Optical Zoom Turret
Now that you have a secure network, you can safely use the best value hardware on the market without fear.
Why I like it: Amcrest offers incredible 4K sensors and optical zoom at a fraction of the price of “Western” brands. Since we blocked its internet access at the router level, its firmware vulnerabilities don’t matter. It’s just a great, dumb video sensor.
The Verdict: Buy the Hardware, Block the Software
Don’t be afraid of budget cameras. Brands like Amcrest or Reolink offer incredible value. You just need to be the boss of your network.
By using simple Parental Controls and Guest Networks, you get the best of both worlds: High-quality 4K video and total privacy.
- Now that your cameras are secure, make sure you are recording everything locally. Check out my guide on Local Storage Options (SD Card vs NVR).
- Since your cameras are blocked from the internet, they rely on your local Wi-Fi. Ensure your router is up to the task with my ISP Router Guide.